This simple tutorial will show you how to auto publish blog posts to Google Plus (G+) via Hootsuite.
I am really bad about getting my posts over to my G+ wall. You have no idea as to how glad I am that I found that I can actually have my posts fed to my wall via Hootsuite. Setting it up wasn’t hard at all.
Follow the steps below and you’ll be on your way to auto publishing your blog posts too!
- Log in to your Hootsuite account.
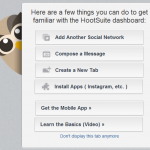
- Now you will need to add G+ to your dashboard. Simply click on ‘Add Another Social Network’. If by chance you have your settings set where you’ve asked not to see this screen anymore – you can still access the screen by clicking on the little ‘house’ under your avatar on the toolbar on the left of the page.

Now you’ll see a screen with several different social networks. Click on Google+ and you’ll see this screen:

- First you must be signed into your G+ profile
- Now click on ‘Connect with Google+’ (you may need to click this twice)
- Allow access to your Google account
- Allow access for Hootsuite to have the permissions requested
- If done correctly – you will see this:

Now click on ‘Finish Importing.’
Now you need to go to the toolbar on the left-hand side of your Hootsuite page
- Hover over the toolbar and all your options are revealed
- Scroll down to ‘Settings’ – another pop out will occur
- Scroll down to RSS/Atom – click on that and you’ll see another pop up like the one below
- Click on + button at the top of the window

You will now be asked to fill in this form:

- The Feed URL – should look something like this: http://feeds.feedburner.com/blogspot/TYncQ – it’s your default feed (you can always right click your mouse as you hover over the RSS icon on your page, to get the link)
- Click on the down arrow where it says ‘Profiles to send feed items to:’ and click on the icon that has what looks similar to four squares
- Decide on how often you want your feed checked for new posts. I have mine set for every hour as I am up at weird hours all night; and yet, you could find me posting during the day.
- Select how many posts you want to send to your G+ wall – I chose 5 (just in case I had one of those good days of running my mouth)
- I left the box that was checked alone – (says ‘Include text from posts in messages’)
- You can add text to the beginning of each message by inserting what you’d like to say in the ‘Prepend text to each message’ box – Now I don’t know if this will affect what is posted to your wall – I would love for you to tell me, if you try it 🙂
- Now choose the URL shortener you’d like for your links by clicking on the down arrow.
You should now see on the screen something like this:

That’s it! You’re ready to roll. Here’s what your posts will look like when they hit your G+ wall:

Go check it out and come back and tell me what you think:) If you need help – just ask 🙂
Thank you! I have always struggled with Google+ and it’s always so bad getting my posts up over there. Having it do it automatically for me will definitely be a HUGE help!
Glad to hear this was helpful for you. I can so relate 🙂
Thanks so much for this! I was looking for a way to autopost on G+ a few months ago and I just decided not to post there at all. This will make my G+ page more active now. 🙂
I’m glad the post helped you 🙂 I’ve accomplished what I’ve set out to do – which is if a post makes someone’s life brighter – even if it’s just one person – I’m very happy! I’ve made two bloggers happy :)- I’m ecstatic!